Felting is a fun and creative way to use your imagination and time to make special gifts for you, your friends and your family. These are tips to get you started.

If you sign up for my newsletter, I will be sharing DIY Patterns and Instructions for some of the felted items that I sell in the shop. If you knit and would like to try making these items, I am happy to share what I have learned about these techniques.
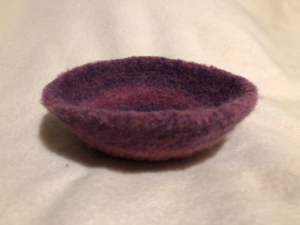
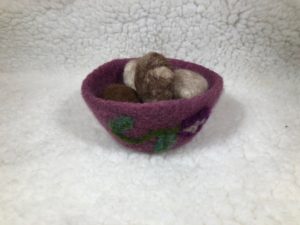
The Bowl Buddy and Pot Handlers are easy to make. If you haven’t done any knitting in the round on multiple needles, these are a great introduction to this knitting method.
My top tips for felt crafters using my patterns:
- Felting is an art form. While using my patterns and following my instructions should result in an item similar to one I made, there are many variables that come into play. There is science involved, but the water temperature, soap used, agitation, timing, even the room temperature can be a factor. Be adventurous! If your first pieces don’t look just right, keep trying! If you are a perfectionist, felting may not become your favorite craft!
- The yarn you use should be all, or nearly all, natural wool fiber. Most yarns will not specify the sheep breed, but sheep wool felts. I am blessed to have access to alpaca fiber in the raw form, so I do use alpaca fleece and yarn. Some people have less success with alpaca, but I love it. Goat (mohair) and rabbit (angora) also felt, but with varying finished characteristics. Small amounts of silk, bamboo or even man-made fiber spun into the wool as a blend will not usually stop the felting process, but it may take longer and give you a different finished effect. I recommend new crafters start with 100% wool.
- Quality matters! Since the cheaper wools on the market are often recycled or blended fibers, the results are not the same. I recently received some wool that did not felt well at all, even though it looked great. The resulting hot mat was very shaggy and had places that never felted.
- Do not use wool that says “washable” or “superwash” or “non-felting”. These yarns have been treated, usually chemically, to prevent the very effect we are going for. They are great for knitting socks, sweaters and other wearables. Not suitable for felting. By the way, though there is a lot of controversy over the process, there are responsible companies producing super wash wool in the USA. The process continues to revitalize US wool production. From sheep ranches to finished products. And that is a good thing, in my opinion.
- While all wool will felt, it does not felt equally. This is particularly important if you are making a utility article. I have been known to spend hours knitting a purse to felt, creatively using a variety of wools, only to be disappointed with the result because some areas were stiff and others were not dense enough to hold up to the use I planned. On the other hand, art and decorative items can be enhanced by using different wools! One way to correct thin areas in any felted piece is to add some needle felting as embellishment. Then you can either wet felt the piece again, or not, depending on your preference.
- Make sure you are using a pattern specifically for felting or fulling. If those mittens fit you before you felt them, you will be handing them down to your 4-year-old after felting. The knit or crocheted item should be loosely constructed and look oversized. The stitch gauge is not critical for felting, but if you have a size goal, it is important.
- Protect your hands! I admit I have trouble following this tip. I don’t really like to wear gloves of any kind. But I pay dearly for my stubbornness. Especially in the winter months, when the air is drier and we are working inside more. Between all the daily episodes of hand washing, and then subjecting my hands to the hot water and wool, my hands get dry, cracked and sore. So, take my advice and make a habit of wearing rubber gloves and save yourself the pain.
- Protect your plumbing! This is a very important tip! These fibers will float around the water bath, and enough loose ones will clog drains, plug washer filters and cost in repairs. I use a dedicated washer for my felting, because I don’t want to have all those wool fibers mixing with my family’s undies. Don’t worry, you don’t need a dedicated washer, you can place your work in fine mesh lingerie bags, with zippers, or tie them into a pillowcase for the washing. I empty the wash or rinse water through a good strainer into a sink that has another strainer at the drain. I do know crafters who get by without all these precautions, but this is my recommendation.
- The new ECO, low water washers present another challenge to craft felters. They are made to operate with minimal water, and many, especially front-loading washers, are not designed to stop and start as you check the progress of your work. Of course, you can felt the items completely by hand, but that is more time consuming, and may give different results. If you decide felting is for you, look into something like the Wonder Washer™. I have this washer and have used it for years. There several other brands available, as a search will show. You don’t need the ones with a spin cycle, since that is not useful for felting. Agitation is most important.
- Don’t over soap. The type of soap to use for felting is another controversial topic. I have tried a variety of liquid soap products, and I still think when getting started, the old Dawn™ product works fine. You can experiment with others if you wish. You only need a small amount of soap, and over soaping can work against the process.
- Water temperature plays an important role. I start out with very hot water in my washer. After a bit, depending on the progress, I may change the cooling down water for a new batch of hot. There are felters who alternate hot and cold water regularly. I may do that for some projects, but not routinely. That is another reason I like the small portable washers. I felt a lot and use much less water with a portable.
- Felting can be done to varying degrees. For the hot mats and kitchen felt pieces I make, I want a thick, tight fabric result. When making jar covers or purely decorative items, especially if I am going to needle felt a decoration over them, I may felt them less. Watch the result. If you can still see your knit or crochet stitches, you may want to keep felting.
- Blocking is an important step for many items. If I am making a pan handler, I will slip the wet/damp piece on a skillet handle to dry. If I am making a bowl buddy, I stretch the piece over one of my kitchen bowls to dry. I use a variety of forms, including canning jars and plastic storage containers, depending on the final shape. I have even used beach balls and balloons for some pieces. Don’t be afraid to tug on the wet piece to shape it. If you felted it properly, a bit of pulling will not undo the work.
- I generally air dry my pieces, but you can also play with putting them in your dryer at some point. It is harder to control the outcome, but may provide just the creative look you want. Remember that creases occur more if you use the washer spin cycle or a dryer.
- Save those fiber scraps! The fluffy fibers that didn’t work into your piece are not trash! Rescue them from the strainer. They can be used as fillers for dryer balls and beads, worked back into soft stones or soap covers. They can be put out for nesting material for the birds. Wool fiber also makes great mulch around house and garden plants!

These tips will get you started. Ready to try it? Sign up for my newsletter and request either the Bowl Buddy Pattern or Pan Handler Pattern of your choice in the comments. Sound too difficult for starters? Coming soon I will be adding some hand felting DIY for soaps and soft stones!
For the terminology police:
True wet felting is the process of laying out wool fibers in specific mats, usually in layers. Then the fibers are joined using hot water, soap and friction. This process is often done by machine, even industrially. Think of craft felt sheets, or even saddle blankets for your horse. It can also be done by hand to create gorgeous wool fabric, scarves and fiber “paintings”.
Needle felting uses dry fiber and barbed needles that repeatedly stab through the fibers until they join. This can also be done by machine. When done by hand, crafters can create both two dimensional and three-dimensional art.
Fulling is when the wool is first spun into yarn, then knit, crocheted or woven into a fabric or a loose shape, after which it is purposely shrunk by washing and agitating to the desired thickness and size. It generally involves some careful blocking, drying and trimming, but results in a useful piece that is also quite decorative.
Unintentional fulling is when you forget that your favorite sweater (or mittens, or scarf) is wool/mohair or angora and you toss it in the washer!
These days the term “fulling” seems to be going away. I tend to call my fulling work – “felting” – perhaps because it seems more inclusive and more easily understood when speaking about the items. The fulled items in my shop are generally described as “felted”. So, arrest me, already!
Leave a Reply